Logging subsystem to print debug messages over USART to PC. More...
Files | |
| file | log_system.c |
| Driver file providing logging functionality over USART, to print debug messages and values to a teminal program on your PC. | |
| file | log_system.h |
| Driver file providing logging functionality over USART, to print debug messages and values to a teminal program on your PC. | |
| file | main.c |
| Main routine for log_system example application. | |
| file | usart.c |
| Driver file providing core USART communication between the target MCU and your PC. This file was adapted from Elliot Williams' Github repo hexagon5un. (link in the see also section below). | |
| file | usart.h |
| Driver file providing core USART communication between the target MCU and your PC. This file was adapted from Elliot Williams' Github repo hexagon5un (link in the see also section below). NOTE: This driver does involve blocking waits, this may be improved on in a later version. | |
Detailed Description
Logging subsystem to print debug messages over USART to PC.
- See also
- The files can be downloaded from the repo at: https://github.com/Jason-Duffy/AVRly/tree/main/content/modules/debug-tools/log-system/example
README
Introduction
In some cases, taking the time to build yourself a well defined and crafted tool can save you an immense amount time in the future. In my opinion, a logging subsystem is one of those cases. It can help to root out tricky bugs by telling you when each function is being entered and exited, and the state of variables along the way.
This tool implements the USART driver, and is a good example of the facade pattern in practice. Note how neither the user nor the log_system module need to know anything about how the message is sent over USART in order to send the messages. If you would like to know how the USART driver works, see the module here.
Interface
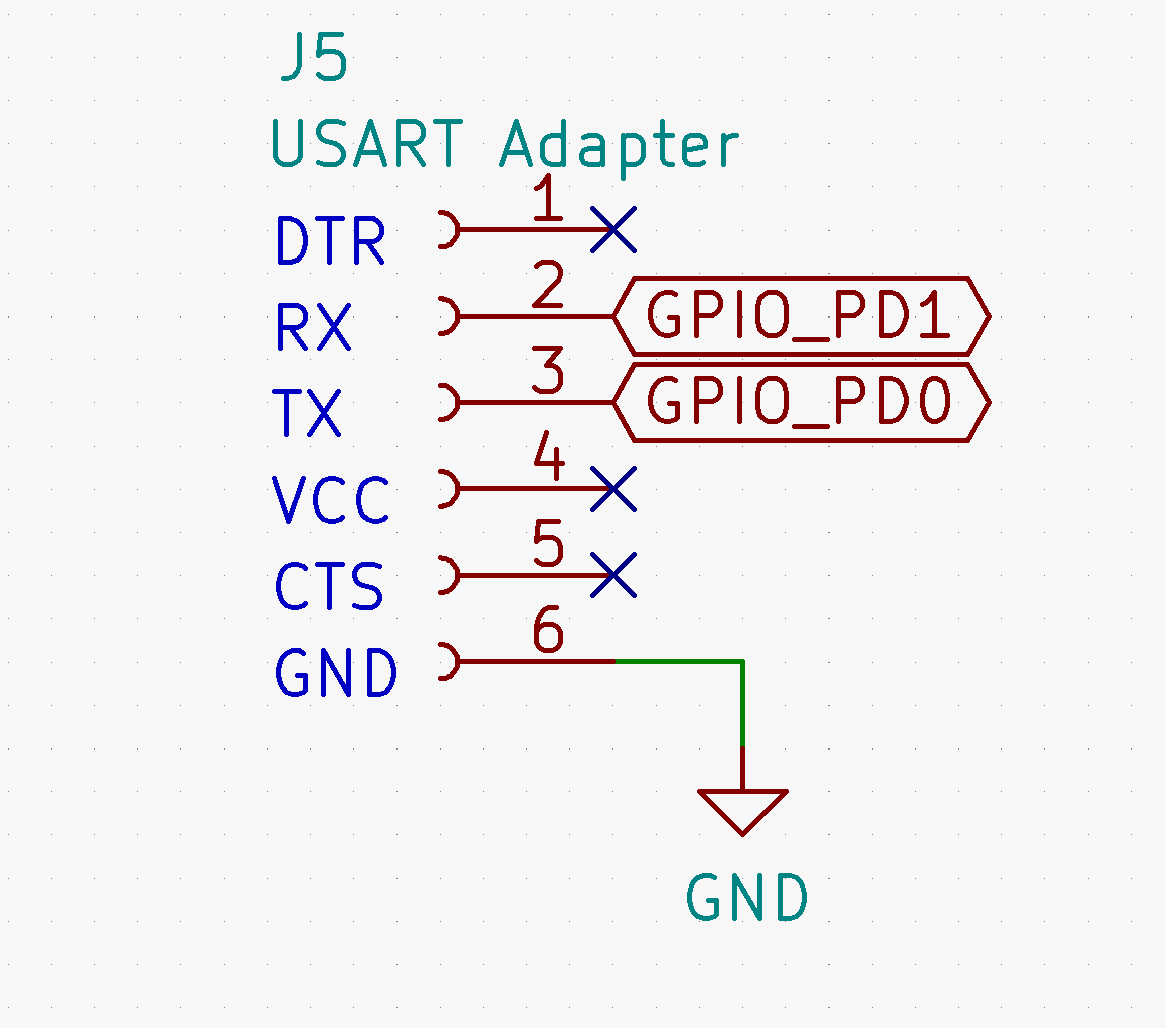
In this example, we will be using a [USB to serial converter][USB_SERIAL_CONVERTER_URL] to communicate between a PC and the AVR MCU. The connections should be made as shown in the schematic below. Note that the RX and TX (Receive and Transmit) pins are crossed over - RX on the host MCU is connected to TX on the adapter and vice versa.

If you are using the AVRly dev kit, then the side of the adapter PCB the components are mounted on should be facing towards the MCU.
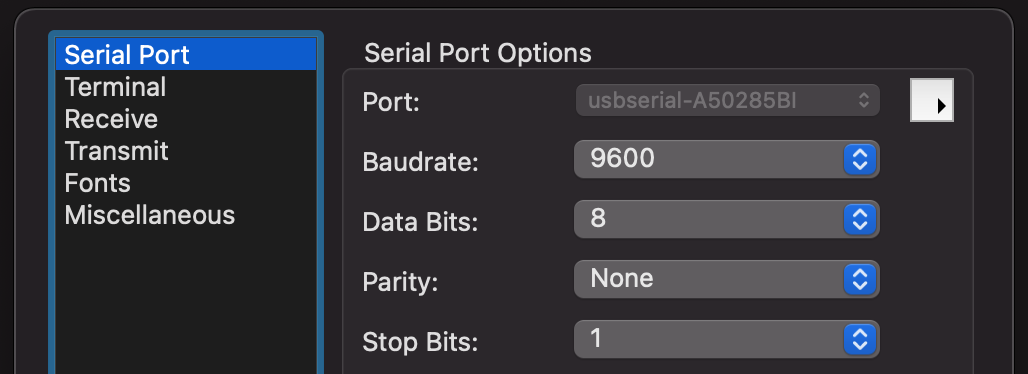
Connect the adapter to the PC using a USB cable, open up CoolTerm, go to Options > Serial Port Options > Port and select the one beginning with "usbserial", then set the baud rate to 9600.

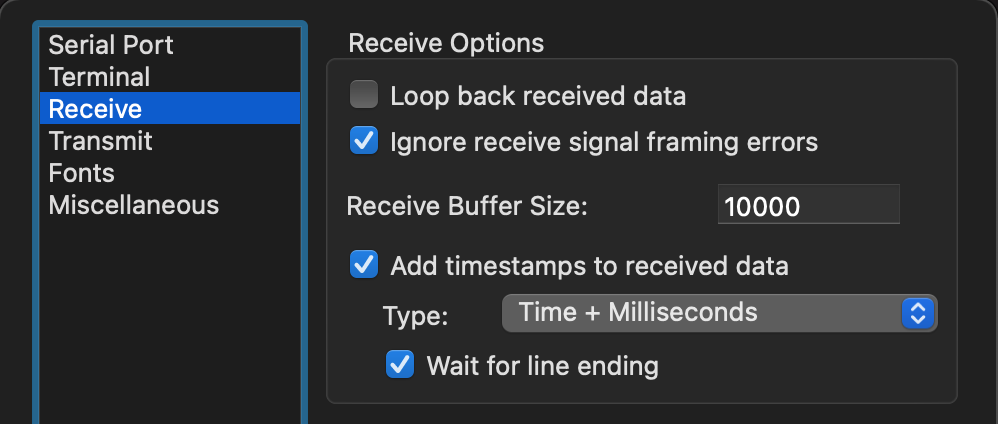
Next, go to "Receive" on the left side of the options menu. Check "Add timestamps to received data" and select "Time + Milliseconds" as the type, then check "Wait for line ending", then press OK.

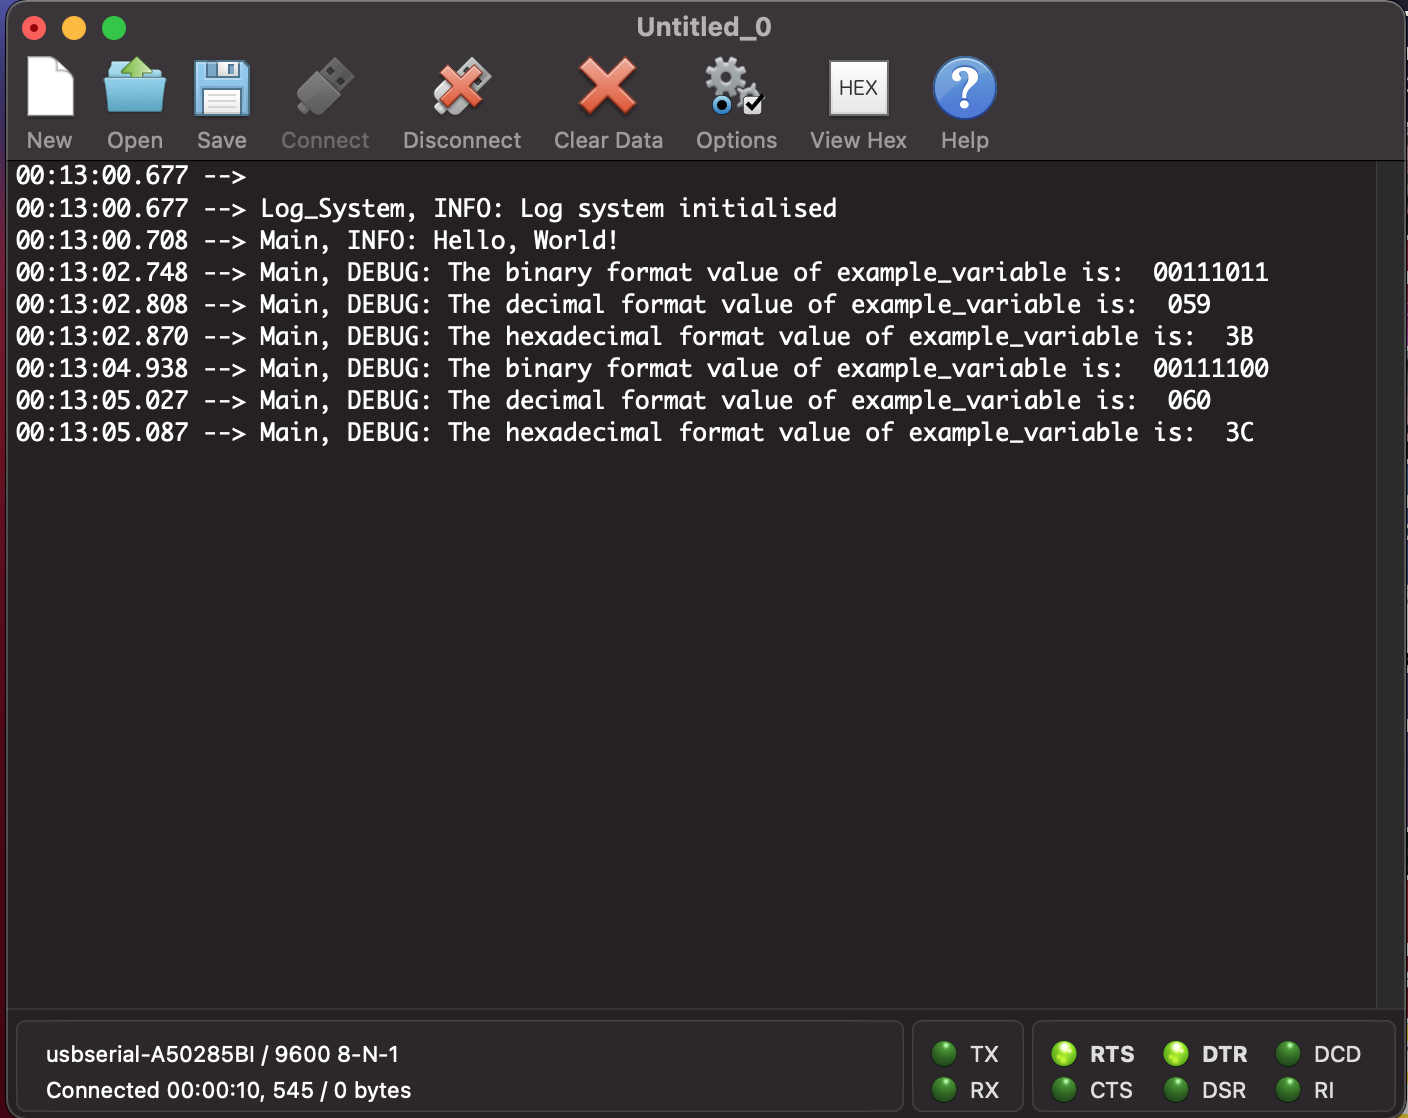
Press the Connect button, and the new connection status should be displayed on the bottom left of the screen. If it's connected, you're ready to start communication! If not, check your connections and repeat the steps above.
Example Application
In each file you want to be able to send log messages from, you'll need to #include log_system.h, and instantiate a config object, as shown below.
p_system_tag is nametag for the file or module, stored as a string. Give it a unique name, and this will be printed to the terminal program so you know where the message came from.
file_log_level is used to set the maximum desired logging output level for that particular file. Acceptable values listed from lowest level to highest are shown in the enumeration log_type_t included with log_system.h
Next, in the main() routine of main.c, you'll need to call the initialisation routine init_log_system() to set up the log system and it's dependancies ready for use.
Once that's done, you can start calling the log functions - just pass the address of the log_system_config_t object in as the first parameter, followed by the log level of the message (again taken from log_type_t), then your message as a string literal, and then sometimes the value to be logged, depending on the function called.
Compile and flash the example application, and you should start seeing the log messages appear in CoolTerm, as shown below.

Insert logging function calls like this throughout your projects, and try to categorise them by output level. That way you can decide the level of detail required in your logs using the file_log_level variable for each file, and/or the log_set_global_max_output_level() function. Once your application is ready to go, it can be useful to leave the log commands in the code, just use log_global_off() to turn off logging. That way if you (or another developer) find a bug later on, you can easily resume logging to find it.
Bear in mind however, that these log messages take quite some time to send, and your devices processor will hang while waiting for each USART frame to be sent, so don't use it in time critical sections of code, and absolutely don't use them inside an ISR. Instead, set a flag in the time sensitive section of code and then log that the flag has been set once the critical section has been left. You may even encounter bugs which disappear when logging is turned on, and reappear when it's turned off! That would potentially indicate a timing issue in your application.
For detailed debugging of timing issues in embedded software, an oscilloscope is invaluable. Set one or more GPIO pins to toggle on/off when certain sections of code (such as ISR's) are entered and exited, then hook those GPIO's up to your scope to capture a timing diagram. You can also determine from this exactly how long sections of code take to execute!